Before and After
Revitalize Your Pool's Surface with Our Non-Corrosive Diamond Disc: A Guide to Smooth Rough Plaster Finishes
If you're looking for an affordable and effective way to fix a rough pool plaster finish, look no further. Our non-corrosive pool plaster disc is an easy-to-use DIY solution that will help you get the smooth finish you want.
Pool Plaster Discs are engineered with premium diamonds bonded with a specialized non-corrosive matrix. The pool plaster disc avoids the issues caused by traditional electroplated metal-bonded abrasive pads, which can elevate sodium hypochlorite and sodium hydroxide levels, leading to corrosion, residue buildup, scaling, formation of calcium nodules, and shortening the life of the salt cell. Instead, our matrix bonding material protects your mineral, chlorine, and saltwater systems, ensuring accurate salt cell readings and consistent chlorine production without compromise. It can be used in both empty pools and those filled with pH-balanced water, without affecting salt generator cell readings.
It's important to understand the significance of pool plaster and why it may become rough over time. Pool plaster is critical in protecting against skin irritation, swimwear damage, and the buildup of dirt and debris in the water. Roughness can occur due to imbalanced water chemistry, organic matter, foreign objects and metallic elements, and the use of acid-based cleaners.
The pool plaster manufacturer recommends that the pool plaster be 5/8 inch thick when applied. Our easy DIY process will help eliminate spot etching, calcium nodules, skin abrasions, bathing suit damage, and topical staining, resulting in a uniform color surface and a welcoming swimming environment.
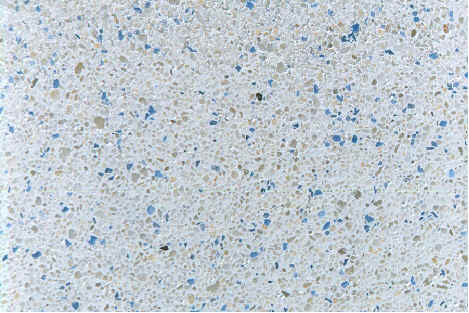
Before Image

The image above displays a pool plaster surface that has been damaged due to the overuse of muriatic acid. The rough surface with the texture of coarse sandpaper can result in skin irritation, abrasions, and damage to bathing suits. If left unaddressed, the rough and discolored finish will lead to spot etching, stains, permanent scaling, and a buildup of algae. This can ultimately render the pool unusable and require complete re-plastering if not properly corrected.
Revamping your pool plaster with a smooth finish using our simple two-step method is both easy to execute and cost-efficient. Regardless of whether you have a color quartz finish or traditional white plaster, having a sleek, attractive plaster finish is within reach and will extend the life of your pool plaster.
The two-step process of resurfacing your pool with our solution eliminates unsightly calcium nodules, spot etching, skin abrasions, salt cell damage, and potential damage to swimwear, resulting in a consistent color surface that makes enjoying your pool a delightful experience.
Empty your pool. This is the ideal moment to fix and replace any components below the water level. These may include lights, stair steps, fixtures, tiles, anchors, railings, and others. Over time, everything below the waterline will require attention and maintenance, so take advantage of this opportunity to get the job done.
-
Drain Your Pool and Prepare the Surfaces Before you start the resurfacing process, you need to drain the water from your pool and make sure all fixtures, including lights, steps, fittings, tiles, anchors, railings, etc., are below the waterline.
Use the Right Tools for the Job. To achieve the best results, use a 7-inch non-corrosive diamond flexible disc attached to an AG7529 7-inch Velcro pad on a polisher or sander. The maximum RPM for this process is 3500. The 7-inch hook and loop backer pad AG7529 used with the 7-inch pool plaster disc ensures full contact with the pool plaster surface for optimal results. Using a smaller diameter backer pad may cause uneven wear on the pool plaster disc and decrease its lifespan.
Resurface with Confidence Now that you have the right tools in hand, you're ready to resurface your pool with confidence. Follow the steps above and enjoy a beautiful, refreshed pool surface in no time.
-
Tackle the Walls. Begin resurfacing the walls under the waterline tiles, working your way down. Next, move on to the floor.
Smooth Out the Flat Surfaces Once the walls are complete, focus on the flat surfaces of the pool. When finished, start on the inside coves and corners.
Avoid Overheating When using the pool plaster disc, it's important not to overheat the disc or plaster. To prevent this, work on a 5 ft. x 5 ft. area at a time and then rinse off the residual plaster material with a hose. This will keep both the pool plaster disc and the pool plaster from overheating. Excessive heat can cause degradation in the integrity of both the pool plaster disc and the pool plaster.
-
Start with the Corners. Begin resurfacing by tackling the inside corners of your pool.
Choose Your Method The pool plaster disc can be used with or without water.
Apply Even Pressure When using the pool plaster disc, apply it evenly and lightly against the plaster. Avoid applying too much pressure, as this can cause premature wear of the disc and gouging of the plaster. The weight of the tool should provide enough pressure for the resurfacing process. As you work, you'll see the pad smooth out the roughness and leave behind a honed, resurfaced finish that is smooth to the touch.
Selecting a Disc
Step 1
Use the selected 50 Grit or 70 Grit you selected to clean and polish down your pool plaster to a flat surface. You need to remove all surface scaling, rough aggregate, and trowel marks. Start by processing 5 square feet before you stop. Remember, not much or no pressure needed. LET THE DISC DO THE WORK. Feel the surface you just processed with your hand. If the areas feel smoother than others, continue till the pool plaster surface is consistent. Uniform texture throughout the pool is significant. By removing the top 1/16" or 1/8" of plaster, you have now removed all surface imperfections, stains, and trowel marks. This is the base and start of your new polished (resurfaced) pool finish. Disc coverage will be approximately 1,500 to 2,000. ft. per disc, depending on roughness and plaster material being removed. When using a pool plaster disc without water, it is important not to overheat the disc by doing a 5 Ft x 5 Ft area, then use a hose to wash off plaster residual material remaining. This will keep the pool plaster disc and pool plaster from overheating. Excessive heat will cause a breakdown in the integrity of both the pool plaster disc and the pool plaster.
Step 2
Now, use WD7120 non-corrosive honed diamond disc for final refining and polishing. You’ll need to remove that slightly textured feel of the plaster. Polish about 4 square feet before you stop. The surface now must have a pleasant, smooth-to-the-touch finish. If you can feel areas that have texture, continue with the WD7120 pad to get the smoothness you desire. The surface will result in a much smoother one now. Coverage approximately 2,000 to 3,000 so. ft. per pad, depending on plaster material. When using a pool plaster disc without water, it is important not to overheat the disc. After doing a 5 Ft x 5 Ft area, use a hose to wash off the plaster residual material remaining. This will keep the pool plaster disc and pool plaster from overheating. Excessive heat will cause a breakdown in the integrity of both the pool plaster disc and the pool plaster
After Image
Maintain Proper Water Chemistry: Before refilling your pool, it's important to understand that proper pH, alkalinity, and calcium hardness levels are crucial to prevent etching of the pool plaster.
Refill Your Pool: With proper water chemistry in place, you can start the process by refilling your pool.
Maintaining the Pool: The plaster of your pool is crucial. Regularly monitoring the surface for changes can prevent future major issues. Adhere to a consistent pool maintenance regimen, maintain proper water balance, ensure the chemical levels are in check, and cover the pool when not in use to prevent stains caused by foreign materials.