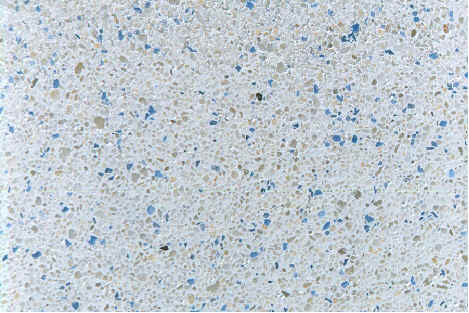
How to make a rough pool plaster finish smooth
Codazon Edit
How to make a rough pool plaster finish smooth using our NON-CORROSIVE Pool Plaster Diamond Disc?
Before and After

Are you worried about the rough finish of your pool and want to fix it without spending much money? We’ve got the seamless DIY solution for you to do it well.
For that, you just need to understand why is pool plaster significant and why does it get rough? Despite the fact that there are different kinds of swimming pools including that is of stainless steel comprising of termination band for good fastening system, the maintenance factors remain the same for all such types. A smooth pool plaster finish is important because it prevents potential damage to a bathing suit, skin irritation, and potential areas for dirt build in the swimming pool. The pool plaster finish gets rough with time due to out-of-balance pool water chemistry, organic matter that blows into the water and sinks to the pool bottom, other foreign elements and objects that enter the pool, and washing with acid.
You can use our non-corrosive Pool Plaster Diamond Disc to cater to the problems of your pool plaster. Since the disk consists of non-corrosive bonding material, you can use it with water or without water.
The manufacturers recommended pool plaster thickness is 5/8 inch thick when applied. Our DIY process will help you eradicate spot etching, calcium nodules, skin abrasions, bathing suit damage. It will result in a consistent color surface and will make your pool a pleasant place to entertain.

The DIY process of resurfacing your pool majorly consists of only two steps followed by some initials.
- You first need to drain your pool, maintain lights, stair steps, fittings, tile, anchors, railings, etc. below the waterline. Using our 7” non-corrosive diamond flexible discs attached to AG7529 7” Velcro pad on a polisher, or sander. (Maximum 4500 RPM). Our 7" diameter hook and loop backer pad AG7529 used with our 7" pool plaster disc ensure 100% contact with the pool plaster finish you are resurfacing. (using a smaller diameter backing pad will cause the pool plaster disc to wear uneven and reduce the life of the pool plaster disc).
- Start with walls under the waterline tile moving downward, next floor. Flat surfaces of the pool will be done.
- Start on the corners. Pool plaster disc can be used with or without water. Begin with applying the whole face of the pool plaster disc evenly and lightly against the plaster. Too much pressure will cause premature wear of disc and plaster gouging. The weight of the tool is all that is needed. As you progress you will see the pad take the roughness away leaving a honed resurfaced to the touch finish.
Selecting a Disc

We have three good product options for a non-corrosive disc. WD7050: 50 Grit NON-CORROSIVE Pool Plaster Disc is used on coarse pool plaster or trowel marks to be removed and leaving a slight texture whereas, WD7070: 70 Grit NON-CORROSIVE Honed Diamond Disc is used on semi-coarse pool plaster or when new polished quartz plaster is to be polished or needs to be buffed lightly. The third one is WD7120: 120 Grit NON-CORROSIVE Pool Plaster Disc to removes the slight texture giving a pleasant smooth polish finish.
Step 1
Use selected 50 Grit or 70 Grit you selected to clean and polish down your pool plaster to a flat surface. You need to remove all surface scaling, rough aggregate, and trowel marks. Start by processing 4 square feet before you stop. Remember not much or no pressure needed. LET THE PADS DO THE WORK. Feel the surface you just processed with your hand. If the areas are felt smoother than others, continue till pool plaster surface is consistent. Uniform texture throughout the pool is significant. By removing the top 1/16" or 1/8" of plaster you have now removed all surface imperfections, stains, and trowel marks. This is the base and start of your new polished (resurfaced) pool finish. Disc coverage will be approximately 1,500 to 2,000 so. ft. per disc depending on roughness and plaster material being removed.
Step 2
Now, use WD7120 non-corrosive honed diamond disc for final refining and polishing. You’ll need to remove that slightly textured feel of the plaster. Polish about 4 square feet before you stop. The surface now must have a pleasant smooth to the touch finish. If you can feel areas that have texture, continue with the WD7120 pad to get the smoothness you desire. The surface will result in a much smoother one now. Coverage approximately 2,000 to 3,000 so. ft. per pad depending on plaster material.
After Image

Sum it up
Get to know that proper pH, alkalinity, and calcium hardness levels are essentials to prevent etching of pool plaster. You can start the process by refilling your pool.
Remember that plaster of your pool is essential. You must monitor changes in the surface to avoid larger-scale problems down the road, practice a consistent pool care routine, keep the water balanced, take care of the chemical levels and try to keep your pool covered when not in use so that stain-causing materials do not affect badly.
